Tutorial, Step 4: Validate data
 |  |  | |  | |  |
- Completed Step 3: Create Expectations of this tutorial.
Set up a Checkpoint
Let’s set up our first CheckpointThe primary means for validating data in a production deployment of Great Expectations.!
A Checkpoint runs an Expectation SuiteA collection of verifiable assertions about data. against a BatchA selection of records from a Data Asset. (or Batch RequestProvided to a Datasource in order to create a Batch.). Running a Checkpoint produces Validation ResultsGenerated when data is Validated against an Expectation or Expectation Suite.. Checkpoints can also be configured to perform additional ActionsA Python class with a run method that takes a Validation Result and does something with it.
For the purposes of this tutorial, the Checkpoint we create will run the Expectation Suite we previously configured against the data we provide. We will use it to verify that there are no unexpected changes in the February NYC taxi data compared to what our ProfilerGenerates Metrics and candidate Expectations from data. observed in the January NYC taxi data.
Go back to your terminal and shut down the Jupyter Notebook, if you haven’t yet. Then run the following command:
great_expectations checkpoint new getting_started_checkpoint
This will open a Jupyter Notebook that will allow you to complete the configuration of your Checkpoint.
The Jupyter Notebook contains some boilerplate code that allows you to configure a new Checkpoint. The second code cell is pre-populated with an arbitrarily chosen Batch Request and Expectation Suite to get you started. Edit the data_asset_name to reference the data we want to validate (the February data), as follows:
yaml_config = f"""
name: getting_started_checkpoint
config_version: 1.0
class_name: SimpleCheckpoint
run_name_template: "%Y%m%d-%H%M%S-my-run-name-template"
validations:
  - batch_request:
      datasource_name: getting_started_datasource
      data_connector_name: default_inferred_data_connector_name
      data_asset_name: yellow_tripdata_sample_2019-02.csv
      data_connector_query:
        index: -1
    expectation_suite_name: getting_started_expectation_suite_taxi.demo
"""
You can then execute all cells in the notebook in order to store the Checkpoint to your Data Context.
What just happened?
getting_started_checkpointis the name of your new Checkpoint.The Checkpoint uses
getting_started_expectation_suite_taxi.demoas its primary Expectation Suite.You configured the Checkpoint to validate the
yellow_tripdata_sample_2019-02.csv(i.e. our February data) file.
How to run validation and inspect your Validation Results
In order to build Data DocsHuman readable documentation generated from Great Expectations metadata detailing Expectations, Validation Results, etc. and get your results in a nice, human-readable format, you can simply uncomment and run the last cell in the notebook. This will open Data Docs, where you can click on the latest ValidationThe act of applying an Expectation Suite to a Batch. run to see the Validation Results page for this Checkpoint run.
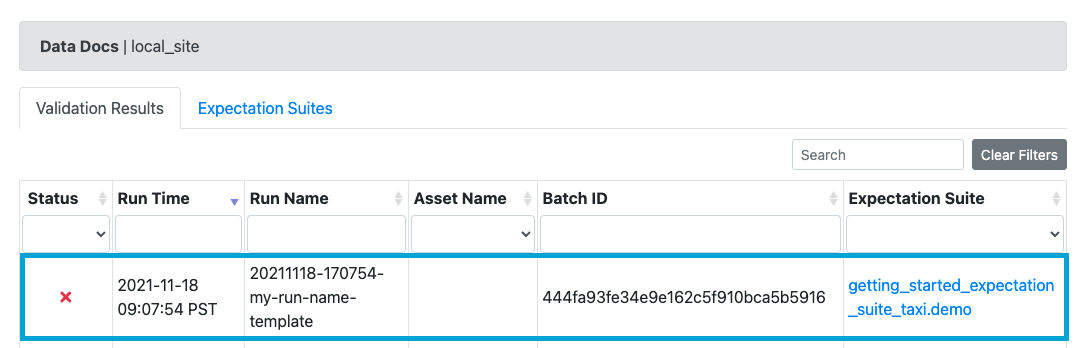
You’ll see that the test suite failed when you ran it against the February data.
What just happened? Why did it fail?? Help!?
We ran the Checkpoint and it successfully failed! Wait - what? Yes, that’s correct, this indicates that the February data has data quality issues, which means we want the Validation to fail.
Click on the highlighted row to access the Validation Results page, which will tell us specifically what is wrong with the February data.
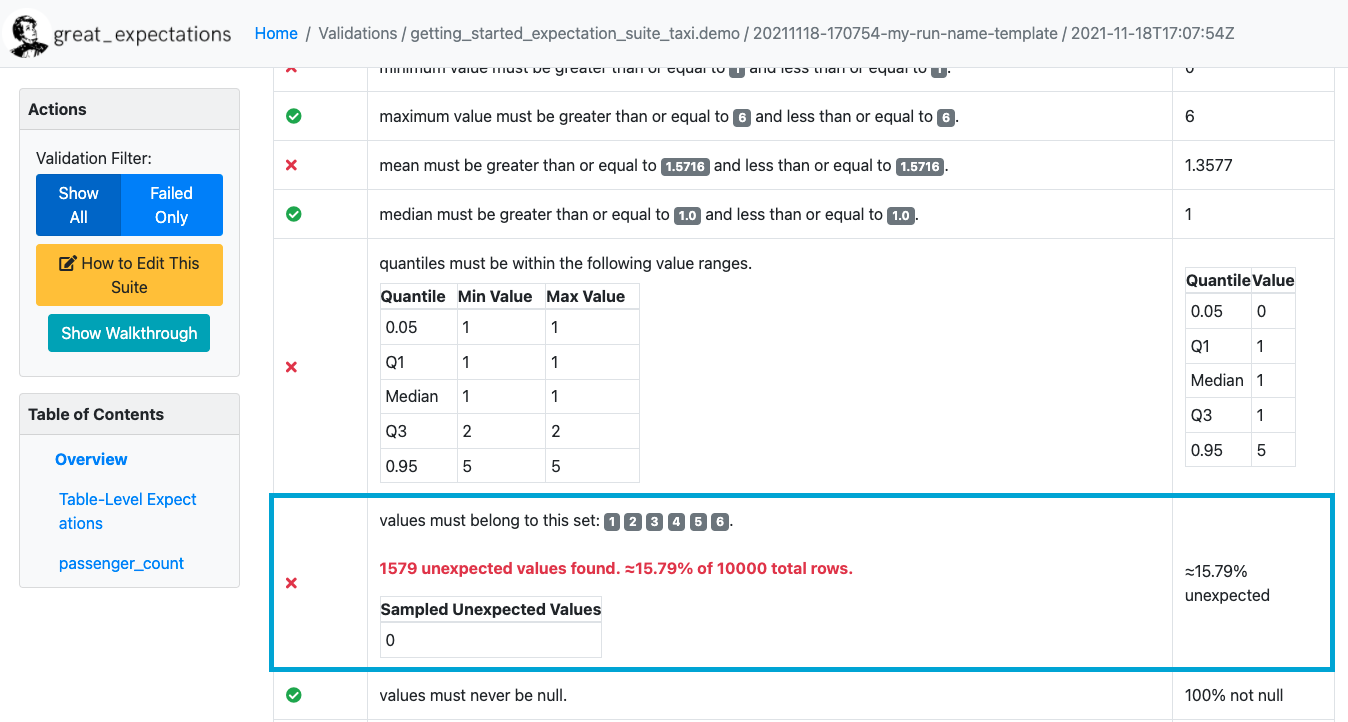
On the Validation Results page, you will see that the Validation of the staging data failed because the set of Observed Values in the passenger_count column contained the value 0! This violates our Expectation, which makes the validation fail.
And this is it!
We have successfully created an Expectation Suite based on historical data, and used it to detect an issue with our new data. Congratulations! You have now completed the “Getting started with Great Expectations” tutorial.